

Tired of your plain white pillow covers? Do you crave a splash of color to invigorate your bedroom decor without breaking the bank on new bedding? Look no further! Dyeing your existing white pillow covers is an incredibly satisfying and surprisingly straightforward DIY project that can completely transform the look and feel of your personal sanctuary. This comprehensive guide will walk you through every step of the process, from choosing the perfect dye to setting the color, ensuring a vibrant and lasting result. Get ready to unleash your inner interior designer and infuse your sleep space with personality!
Why Dye Your Pillow Covers?
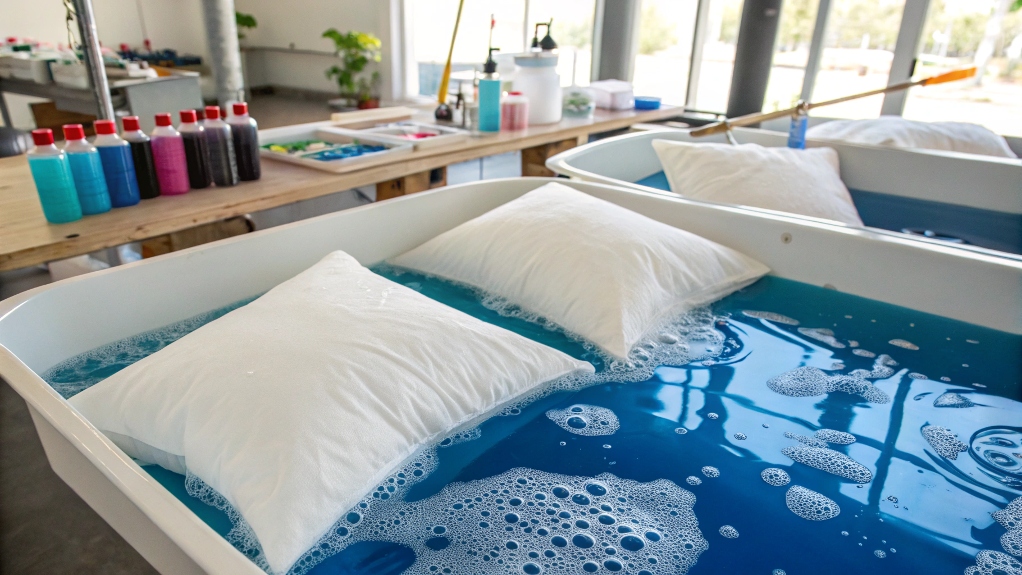
Beyond the obvious aesthetic upgrade, dyeing offers several compelling advantages:
- Cost-Effective: It’s significantly cheaper than buying a whole new set of colored pillow covers, especially if you already own white ones.
- Customization: You have complete control over the color, shade, and even patterns (if you’re feeling adventurous with techniques like Shibori or tie-dye). This allows you to perfectly match your existing decor or create a truly unique statement piece.
- Sustainability: Reusing and upcycling your current textiles reduces waste and promotes a more eco-conscious lifestyle.
- Creative Outlet: It’s a fun and rewarding project that allows you to express your creativity and personalize your home.
Before You Begin: The Essentials
Successful dyeing hinges on proper preparation and the right tools. Gather these items before you start:
- White Pillow Covers: Preferably 100% cotton, linen, rayon, or silk. Synthetic blends (like polyester) are notoriously difficult to dye evenly with conventional fabric dyes. Check the care tag!
- Fabric Dye:
- All-Purpose Dye: Great for natural fibers (cotton, linen, rayon, silk). Offers a wide range of colors and is generally easy to use.
- Fiber-Reactive Dye: Ideal for cotton, linen, rayon. Provides the most vibrant and wash-fast results, especially for intense colors. Requires a soda ash fixative.
- Dye for Synthetics (if applicable): If you absolutely must dye a synthetic blend, you’ll need a specialized dye like Rit DyeMore for synthetics. Be aware that results can be unpredictable on blends.
- Large Container: A plastic bucket, stainless steel pot (dedicated for dyeing, not food!), or even a clean utility sink. Avoid anything porous that could absorb the dye.
- Rubber Gloves: Essential to protect your hands from dye.
- Stirring Utensil: A long spoon or stick, again, dedicated for dyeing.
- Salt (for natural fibers): Helps the dye absorb more evenly, especially with all-purpose dyes.
- Soda Ash (for fiber-reactive dyes): A crucial fixative that bonds the dye to the fabric, ensuring permanence and vibrancy.
- Dish Soap or Laundry Detergent: For pre-washing and post-rinsing.
- Measuring Cups and Spoons: For accurate dye and additive measurements.
- Protective Covering: Old newspapers, plastic sheeting, or a drop cloth to protect your work surface from spills.
- Paper Towels/Old Rags: For quick clean-ups.
- Clothesline or Drying Rack: For drying the dyed pillow covers.
Choosing Your Color and Dye Type
This is where the fun begins!
- Consider Your Existing Decor: Do you want a subtle accent or a bold statement?
- Test Swatches (if possible): If you have an old white t-shirt or scrap of fabric made from the same material as your pillow covers, do a test dye! This helps you gauge the true color outcome.
- Dye Type Matters:
- For rich, deep colors on cotton/linen: Fiber-reactive dyes are your best bet. They offer superior wash-fastness and vibrancy.
- For general use and easier application on natural fibers: All-purpose dyes are a good starting point.
- For pastels or subtle shades: You’ll use less dye, so follow the dye package instructions for diluting.
The Dyeing Process: A Step-by-Step Guide
Now, let’s get those pillow covers colored! Remember to always refer to the specific instructions on your chosen dye package, as concentrations and timings can vary.
Step 1: Prepare Your Work Area
Lay down your protective covering. Ensure good ventilation, as some dyes can have a strong odor. Have all your tools and ingredients within reach.
Step 2: Pre-Wash Your Pillow Covers
Wash your white pillow covers in warm water with a small amount of laundry detergent. Do NOT use fabric softener, as it can create a barrier that prevents the dye from absorbing evenly. This step is crucial for removing any sizing, dirt, or oils that could interfere with the dyeing process. Rinse thoroughly. Keep the covers damp; dye absorbs best into wet fabric.
Step 3: Prepare the Dye Bath
- Calculate Water Volume: You need enough water for your pillow covers to move freely in the dye bath. A general rule of thumb is 3 gallons of water per pound of dry fabric.
- Heat the Water (if required): Many dyes work best with hot water. For all-purpose dyes, aim for around 140°F (60°C). For fiber-reactive dyes, room temperature to warm water is often preferred for the initial mixing, with some requiring subsequent heat or a separate soda ash bath.
- Mix the Dye: In a separate smaller container, dissolve the dye powder or liquid according to the package directions. Some dyes require pre-dissolving in hot water before adding to the main dye bath. Stir well to ensure no clumps remain.
- Add Additives (if necessary):
- Salt: If using an all-purpose dye for natural fibers, dissolve the recommended amount of non-iodized salt into the main dye bath. This helps the dye penetrate the fibers more effectively.
- Soda Ash: If using a fiber-reactive dye, prepare a separate soda ash solution by dissolving it in warm water. You’ll add this after the fabric has been in the dye bath for some time (check your dye instructions!). This acts as the fixative.
Step 4: Immerse the Pillow Covers
Carefully submerge the damp pillow covers into the dye bath. Make sure they are fully immersed and not bunched up. Use your stirring utensil to gently agitate them, ensuring even dye distribution.
Step 5: Dyeing Time
- Constant Agitation: Continuously stir and move the pillow covers around in the dye bath for the entire dyeing time. This is arguably the most important step for achieving even color. Skipping this will result in splotchy or unevenly dyed fabric.
- Timing: The dyeing time will vary depending on the desired shade and the type of dye.
- All-Purpose Dyes: Typically 30-60 minutes, or until the desired shade is achieved. The fabric will look darker when wet.
- Fiber-Reactive Dyes: Often 20-30 minutes of initial dyeing, followed by the addition of soda ash, and then another 30-60 minutes of dyeing.
- Adding Soda Ash (for Fiber-Reactive Dyes): If using fiber-reactive dyes, after the initial dyeing time, slowly add the pre-dissolved soda ash solution to the dye bath while continuing to stir. This will “fix” the dye to the fabric.
Step 6: Rinsing
This is crucial for preventing excess dye from bleeding onto other fabrics in future washes.
- Initial Rinse: Carefully remove the pillow covers from the dye bath (wearing gloves!). Rinse them under cool running water. The water will be very colored at first. Keep rinsing until the water runs clear.
- Soapy Rinse: Once the water runs clear, wash the dyed pillow covers in warm water with a small amount of dish soap or laundry detergent. This helps remove any unbound dye molecules. Rinse again until the water runs clear. You may need to repeat this step a few times, especially for dark or intense colors.
Step 7: Drying
- Machine Dry: For most fabrics, you can machine dry on a regular cycle. The heat can help set the color further.
- Air Dry: Alternatively, hang your pillow covers on a clothesline or drying rack. Avoid direct sunlight during the initial drying, as it can sometimes fade fresh dye.
Troubleshooting and Tips for Success
- Uneven Dyeing/Splotches: This is almost always due to insufficient agitation during the dyeing process or fabric not being fully wet before immersion.
- Fading:
- Insufficient Dye: You may not have used enough dye for the desired depth of color.
- Improper Fixation: For fiber-reactive dyes, ensure you used the correct amount of soda ash and allowed enough time for it to work.
- Washing with Harsh Detergents: Use a color-safe detergent for future washes.
- Color Doesn’t Match Expectations: Dye color on the package often varies slightly from the final result, especially depending on the fabric composition. Test swatches are your friend!
- Protect Your Washing Machine: If you use your washing machine for rinsing, run an empty cycle with hot water and a bit of bleach or washing machine cleaner afterwards to remove any residual dye.
- Embrace Imperfection: Part of the charm of DIY dyeing is the unique, sometimes slightly imperfect, result. Don’t strive for factory perfection; instead, enjoy the handmade character of your refreshed pillow covers!
- Post-Dye Care: Wash your newly dyed pillow covers separately for the first few washes to prevent any potential dye transfer to other laundry. Use cold water and a gentle cycle for longevity.
Beyond Basic Dyeing: Get Creative!
Once you’ve mastered the basics, consider exploring more advanced techniques:
- Tie-Dye: Use rubber bands, string, or clamps to create intricate patterns by resisting dye penetration.
- Shibori: A Japanese resist dyeing technique involving folding, twisting, and binding fabric to create beautiful geometric or organic patterns.
- Ombre: Gradually transition from one color to another, or from a dark shade to a lighter one, by carefully dipping and raising the fabric in the dye bath.
- Dip-Dye: Create a distinct line where the dye stops by partially submerging the fabric.
Read More Also: The Truth About MVMI Pillows: Real Reviews from Real Buyers
Conclusion
Dyeing your white pillow covers is a rewarding and affordable way to infuse new life into your bedroom decor. With a little preparation, the right tools, and a touch of creativity, you can achieve stunning, personalized results that reflect your unique style. Say goodbye to bland white and hello to a vibrant, custom-colored sleep sanctuary. Happy dyeing!
Discover More: Decorative Pillows vs. Support Pillows: A Comprehensive Comparison