
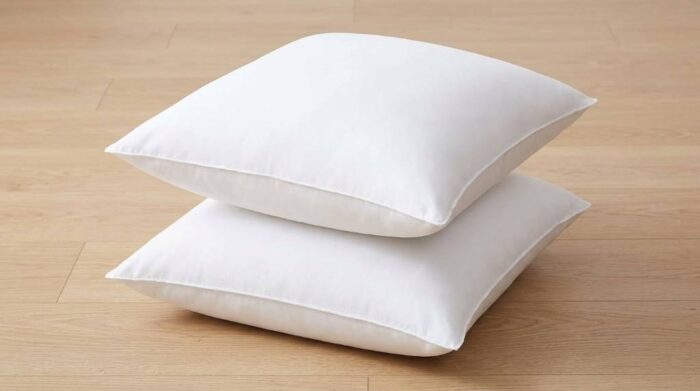
Fluffing Miulee throw pillow inserts usually takes gentle shaking, squeezing, and controlled dryer time. Miulee recommends 5 to 10 minutes initially, while some models specify 20 to 30 minutes with dryer balls. The right method depends on the insert’s filling, cover, and current condition. Proper fluffing restores loft without damaging the fibers or seams. If your miulee throw pillow inserts arrived compressed, patience matters more than force. Most inserts need several deliberate steps before they regain their intended shape.
Key Takeaways
- Start by removing the insert from its decorative cover.
- Shake and massage every section before using heat.
- Use dryer balls on a warm or low-heat setting.
- Check the insert every few minutes during drying.
- Never use excessive heat to force faster expansion.
- Choose a properly sized cover for the fullest appearance.
Why Miulee Inserts Sometimes Look Flat
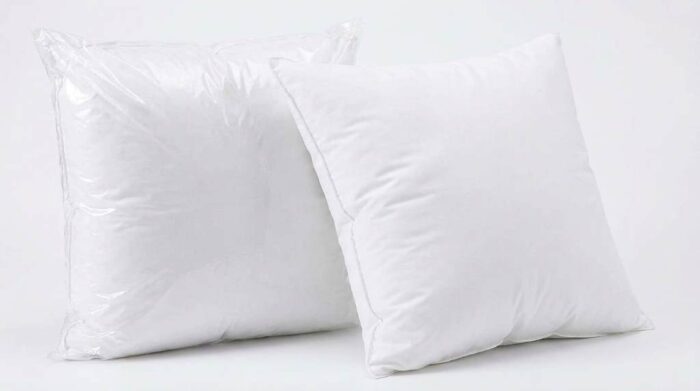
Many Miulee inserts arrive compressed to reduce package size during shipping. Therefore, a newly opened insert can look surprisingly thin or uneven. Compression temporarily pushes the filling together, especially around corners and edges. The insert needs movement and airflow before the fibers recover their loft.
Miulee uses different fillings across its insert range, including microfiber and down-alternative options. Consequently, recovery speed can vary between individual products and sizes. A compact insert may expand quickly after shaking, while another needs gentle mechanical agitation. Avoid judging its final appearance immediately after opening.
Start With Manual Fluffing
Remove the Cover First
Always remove the decorative cover before fluffing the insert. A tight cover restricts movement and prevents the filling from spreading evenly. Additionally, removing the cover lets you inspect the insert for compressed corners or visible lumps. Keep the cover aside until the insert reaches its full shape.
Shake From Multiple Directions
Hold the insert firmly by two opposite corners and shake it several times. Next, rotate it and repeat the movement from another direction. This action separates compressed fibers and redistributes filling across empty areas. Continue until the insert feels noticeably more flexible and evenly filled.
Massage the Corners
Pinch each corner gently and pull the filling toward that area. Then work across the edges using your fingertips. Avoid twisting the fabric because excessive tension can stress seams and piping. Instead, use short squeezing movements to loosen compact sections.
Use the Hand-Fluffing Method for Gentle Recovery
Hand fluffing works especially well when your insert already has reasonable volume. Place it flat on a clean surface and press the center gently. Release the pressure, then repeat around the remaining sections.
Next, fold the insert loosely without creating a sharp crease. Give it several light squeezes before opening it again. This process encourages trapped compression to release without exposing the filling to heat. Finally, shake the insert and inspect all four corners.
How To Fluff Miulee Inserts in a Dryer
A dryer provides faster and more consistent agitation than manual fluffing. Miulee specifically recommends using dryer balls with a warm setting for certain inserts. However, always prioritize the care instructions associated with your specific model.
Follow These Dryer Steps
- Remove the insert from its pillow cover.
- Check the seams, piping, and fabric for damage.
- Place the insert inside the dryer by itself.
- Add two or more clean dryer balls.
- Select a warm or low-heat setting.
- Run a short cycle before checking the insert.
- Shake and rotate the insert after checking it.
- Continue briefly if compressed areas remain.
- Remove the insert once it feels evenly expanded.
Miulee product guidance lists 20 to 30 minutes with dryer balls for some models. Another Miulee recommendation suggests only 5 to 10 minutes for initial fluffing. Therefore, avoid treating every model as though it needs the same drying time.
Why Dryer Balls Help
Dryer balls repeatedly separate compressed sections as the drum rotates. That mechanical action helps the filling spread throughout the insert. They also reduce the need for aggressive manual squeezing. Most importantly, they provide agitation without requiring excessive heat.
Warm Heat Matters More Than High Heat
High heat may seem like the fastest solution, but it creates unnecessary risk. Excessive heat can affect synthetic fibers, fabrics, seams, or finishing materials. Instead, choose a warm or low-heat setting whenever the care instructions permit drying.
Check the insert periodically rather than starting one long, unattended cycle. If the insert feels hot rather than comfortably warm, stop the dryer. Let it cool before continuing with manual fluffing. This controlled approach protects the insert while still restoring useful loft.
How To Fix Lumpy Miulee Pillow Inserts
Lumps usually indicate uneven filling distribution rather than permanent damage. First, locate the dense sections by running your hands across the entire insert. Then push excess filling toward thinner areas using gentle palm pressure.
Afterward, hold the insert by two corners and shake it vertically. Repeat the process horizontally to redistribute the fibers. Finally, place it in the dryer briefly with dryer balls if the care instructions allow.
Use a Section-by-Section Approach
- Start with the densest corner.
- Push compressed filling toward nearby empty areas.
- Massage the edge with small circular movements.
- Shake the insert after treating each section.
- Finish with a short dryer cycle when appropriate.
This method works better than repeatedly punching the center. Focused redistribution produces a more balanced shape across the entire insert. It also helps prevent one area from becoming excessively dense.
How To Make Miulee Inserts Look Fuller Inside Covers
Fluffing alone cannot solve every flat-looking pillow. The relationship between insert size and cover size strongly affects the finished appearance. A correctly sized insert should fill the cover without creating excessive strain around the zipper.
If the insert looks flat after proper fluffing, check the cover dimensions first. A loose cover can make even a well-filled insert appear undersized. Conversely, an excessively tight cover can compress the filling and create unwanted bulges.
Check the Shape After Inserting
Place the fluffed insert inside the cover and push each corner fully into position. Then close the zipper without forcing it. Hold the pillow upright and gently pull the cover’s corners outward.
Next, pat the front surface to distribute the filling. Avoid repeatedly compressing the center because that can flatten the insert again. A few controlled adjustments usually create a cleaner decorative shape.
Square Versus Lumbar Miulee Inserts
Square inserts need balanced filling across four corners and four edges. Lumbar inserts require more attention along their longer sides. Therefore, use different hand movements depending on the insert’s shape.
For square inserts, alternate diagonal shaking with horizontal shaking. For lumbar inserts, shake from each short end toward the center. This approach helps prevent filling from collecting unevenly at one end.
How Often Should You Fluff Miulee Inserts?
Decorative pillows benefit from light fluffing whenever they start looking compressed. High-use sofa pillows may need attention more frequently than pillows used only for decoration. Regular maintenance prevents severe compression from developing.
For everyday use, shake the insert whenever you rearrange the pillows. Then perform deeper manual fluffing when the pillow loses noticeable loft. Reserve dryer treatment for inserts that remain compressed after ordinary agitation.
What Not To Do When Fluffing
- Do not use maximum dryer heat without checking care instructions.
- Do not twist the insert aggressively around its center.
- Do not punch one area repeatedly.
- Do not force an oversized insert into a small cover.
- Do not ignore damaged seams before using a dryer.
- Do not assume every Miulee insert requires identical drying time.
These mistakes can create uneven filling, unnecessary fabric stress, or avoidable heat exposure. Instead, combine gentle mechanical movement with controlled drying. That method delivers better results without treating the insert harshly.
When Dryer Fluffing Does Not Work
Sometimes an insert remains flat despite several careful fluffing attempts. First, inspect the filling distribution and seams for unusual compression or damage. Then check whether the cover itself limits the insert’s expansion.
If the insert still feels unusually thin, compare its condition with its original dimensions. Persistent deformation may indicate filling loss or material fatigue. At that point, repeated drying will not necessarily restore the original loft.
A Simple Miulee Fluffing Routine
| Situation | Recommended Method | What to Watch |
|---|---|---|
| Newly opened insert | Shake and massage | Compressed corners |
| Slightly flat insert | Manual fluffing | Uneven filling |
| Heavily compressed insert | Dryer with balls | Heat level |
| Lumpy insert | Section massage | Dense areas |
| Flat appearance in cover | Check sizing | Loose or tight cover |
| Persistent deformation | Inspect condition | Seams and filling |
Frequently Asked Questions
How long should I put a Miulee pillow insert in the dryer?
Start with a short cycle, while some Miulee models recommend 20 to 30 minutes with dryer balls.
Can I fluff a Miulee insert without a dryer?
Yes, shake, squeeze, massage, and rotate the insert until the filling distributes evenly.
Should I use high heat to fluff Miulee inserts?
No, use warm or low heat when the specific care instructions permit machine drying.
Why does my Miulee insert still look flat?
Check filling distribution, cover sizing, compression, and possible material damage before repeating dryer cycles.
Can dryer balls make Miulee inserts fluffier?
Yes, dryer balls provide mechanical agitation that can help separate compressed filling during drying.
Final Thoughts
The best way to fluff a Miulee insert combines gentle manual agitation with controlled dryer treatment. Start with shaking and massage, then use dryer balls when the care instructions support machine drying. Avoid excessive heat because faster drying does not guarantee better loft.
For the best decorative result, also check your pillow cover size and corner placement. A properly fluffed insert inside a suitable cover creates a noticeably fuller appearance. Try the manual method first, then use short dryer cycles when additional recovery becomes necessary.
If your Miulee inserts look flat today, begin with a careful five-minute fluffing session. Give each corner attention, redistribute the filling, and inspect the result before adding heat. With consistent maintenance, your decorative pillows can keep their shape and polished appearance longer.